Wednesday, August 8, 2012

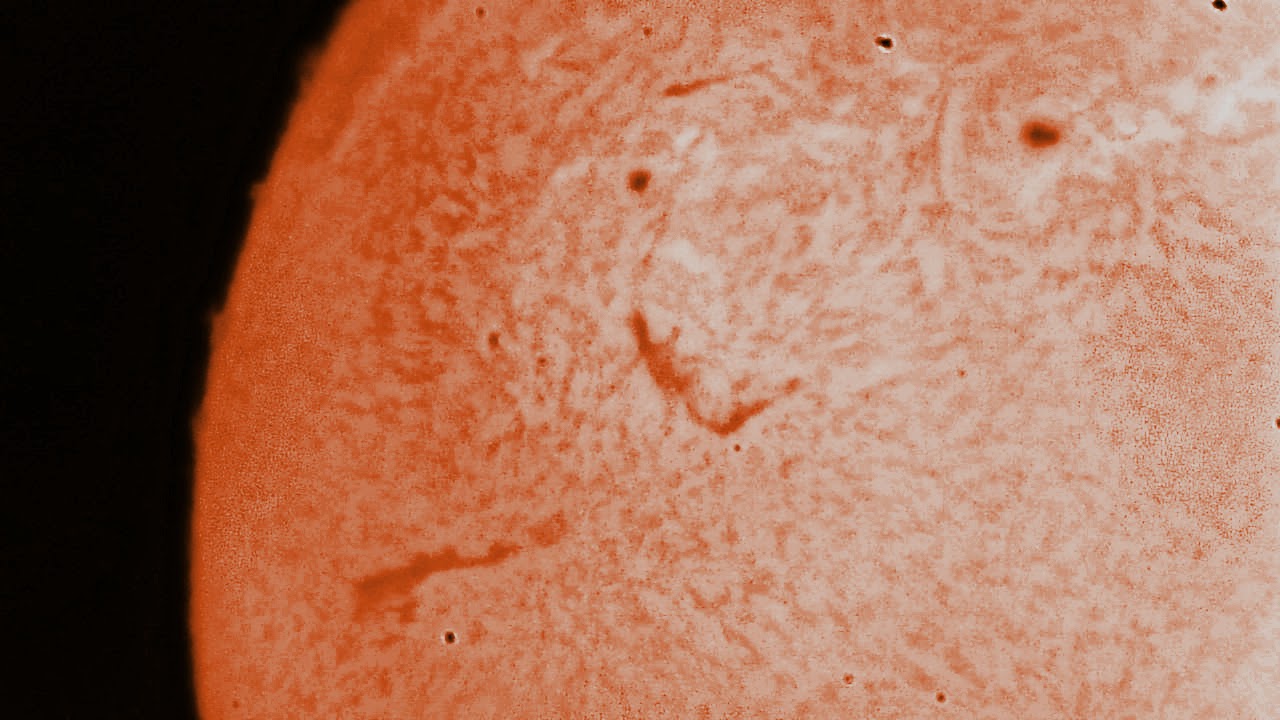
Huge Filament--3


 This is another image documenting the continued evolution of this large solar filament.  Note the "braiding" on the right hand side of this image, and the break toward the left.  Contrast this with other images of this feature in earlier posts. This is a stack of 970 images (Astrostack), wavelet processing and final tweaks in Corel Paint Shop Pro X2 and Windows.

Monday, August 6, 2012

Huge Filament Day 2


Here's a pic of this enormous filament today.  Note the evolution of the shape; it is much more "shredded."  Perhaps the magnetic field is collapsing. These images are combinations of two separate 1000 frame captures.  The upper pic is colorized, mainly just to look pretty, but it also enhances some of the details. Seeing was significantly poorer than yesterday.

Sunday, August 5, 2012

Observatory Part 6

Great progress on the build yesterday.  My son (Scott) and I headed out to the site with 2x6s to replace the 2x4s (see the Observatory Part 5 post).  The building had been banged around a little by a storm several days ago, but damage was very light (just a few small 'dings').  We spend most of the day working in 100 degree weather, but the result was worth it (Scott, you did an awesome job!). The work we did made everything very solid.  We had 70 mph winds and storms early this morning (Sunday).  I went out to the site full of trepidation, but the building was just fine with no further bending of the panels!

As you can see from the pix, we added the 2x6s to make the top frame for the observatory.  We added extra supports to the 4x4s with some spare timber, and also braced the 2x6s with horizontal 2x4 braces in the corners.  The result was a very robust frame.  We also braced the center of the 12 foot walls with a 2x4.  These walls, plus the back wall, will eventually be true stud walls with insulation and a finish wall of some kind on top.  We also added 4x4s on the long walls, attaching them with pole barn nails. The 4x4s give extra wall height and will form the tracks for the roll off roof.  Below are some pix taken at the end of the day.


You might notice some of the storm damage in these pix.  Note the twist in the center brace on the rear wall. The side wall was also slammed by winds and the next pic shows some of this minor damage (creasing):


The bracing and the attachment of the 2x6s to the top of the wall should prevent any further flexture.  The next steps are to attach the door and the build the roof frame and the roof.

Huge Filament


The Yahoo PST group tipped me off about this huge filament.  One of the members estimated it is about 800,000 km in length--that's over twice the distance from the earth to the moon!  This is a stack of around 900 images, captured with a Microsoft Lifecam, stacked in Registax 6 and tweaked in Corel Paint Shop Pro X2 and Windows Gallery; tracking was equatorial and manual (slow motion).  Thanks to everyone in the PST and QCUIAG groups who has encouraged me to continue improving my pix; I think this is one of the best I have ever taken!

Thursday, August 2, 2012

Three Pix

These pix are single exposures taken today in very poor seeing conditions (the sun was in hazy cloud and shimmering like the reflection on the surface of a pond.  Notice, however, that the focus seems a little better on these than my previous efforts.  I simply attached a clothes peg to the focusing knob of the PST, and focusing became much, much easier!


Wednesday, August 1, 2012

Filaments Near AR 1529 and AR 1530


Some nice filaments on the solar disk near AR 1529 and AR 1530. Things are heating up nicely for Solarmax!

A Wall on the Sun


This filament, close to AR 1538 (at the 1 o'clock position), looks almost like a wall stretching to the prominences on the solar limb.


Seven hours on the Horsehead with the Seestar S50

The Horsehead Nebula never gets old. This image is a seven hour integration taken with the S50. I procesed it in Siril with RC Astro tools a...